Tuesday, 7 February 2012

Memories of the UK Part 3

 Angel of the North, Gatehead, Tyne and Wear, England

 Tynemouth Priory, Tynemouth, Tyne and Wear, England

Fancy door knocker.

Monday, 6 February 2012

Thrift Store Find - Painted

In my last post I showed you my recent thrift store finds that I was going to give new life to.

The first one I started on was the wall plaque. I found it to dull looking, so as with a lot of my purchases, I painted it!

Wall plaque before.

Wall plaque during - I gave it a coat of gold paint. The gold I like to use is called 'Sahara Gold'. I like it because it's a warm gold instead of being too yellowy. 

 Wall plaque after - Once the gold coat was completely dry, I brushed on some dark brown paint, making sure that it got into all of the cracks and crevices, and rubbed it off of the raised bits with some dry paper towel. 

I'm pleased how this turned out. The details seem to stand out more now that it's painted.

I was going to put up a picture of it hanging on the wall, but I had a little incident. I couldn't find my level, so I decided I would 'wing it' and use my trusty eyes. It turns out I'm quite crooked and so was the plaque once I put it up. I've had to fill one of the plug/screw holes with Polyfilla and wait till it dries so I can try again tomorrow. Lessons of the day: Always use a level and don't wing it!

Hanging picture to follow once I find my level!

Sunday, 5 February 2012

New Thrift Store Finds

I went out to one of my local thrift stores this afternoon, and I managed to find some great things for our house. As always, I am going to make some changes to them and will post them shortly.

Recently, I've been keeping my eyes open for a hanging pendant lamp for our front entrance. The one that we have right now is a standard builders light (not really anyone's style). I knew I couldn't afford most of the new  lights in the stores, as they seem to run between $70 and $100 for ones that are not even that fancy. I kept checking out the lighting area in the local thrift stores, and I finally found one! It needs some work, but I think it's pretty nice.


 I paid $9.99 for this. I'm not too sure if I'm going to keep the glass droplets or not yet, but if not I'll keep them for future projects. I think it'll be pretty easy to fix it up. The only problem is, I don't know if it works or not! If it doesn't, I guess I'll have to learn how to re-wire a light.

 I then found this floral wall plaque. Not much needs to be done to this, but I'm pretty sure I'll end up painting it whether it's necessary or not.

As the sticker says, I paid $6.99 for it. It's pretty heavy, so it's great that it has two spots for picture hangers or some trusty screws.

 This is the lamp that I found. The middle section of the base is made of amber coloured crackle glass. I really like the shape of the shade, but sadly, it's in really bad condition and has stains all over it. I might use the wire frame from the lampshade to make something new, or I may end up finding a totally different one.


 It has great ornate details and has lots of character. I plan on painting it a different colour, as I find that the gold it is now is a bit too yellow.


These next pieces are from around a month ago and have already been re-done. Again they were from a thrift store. 

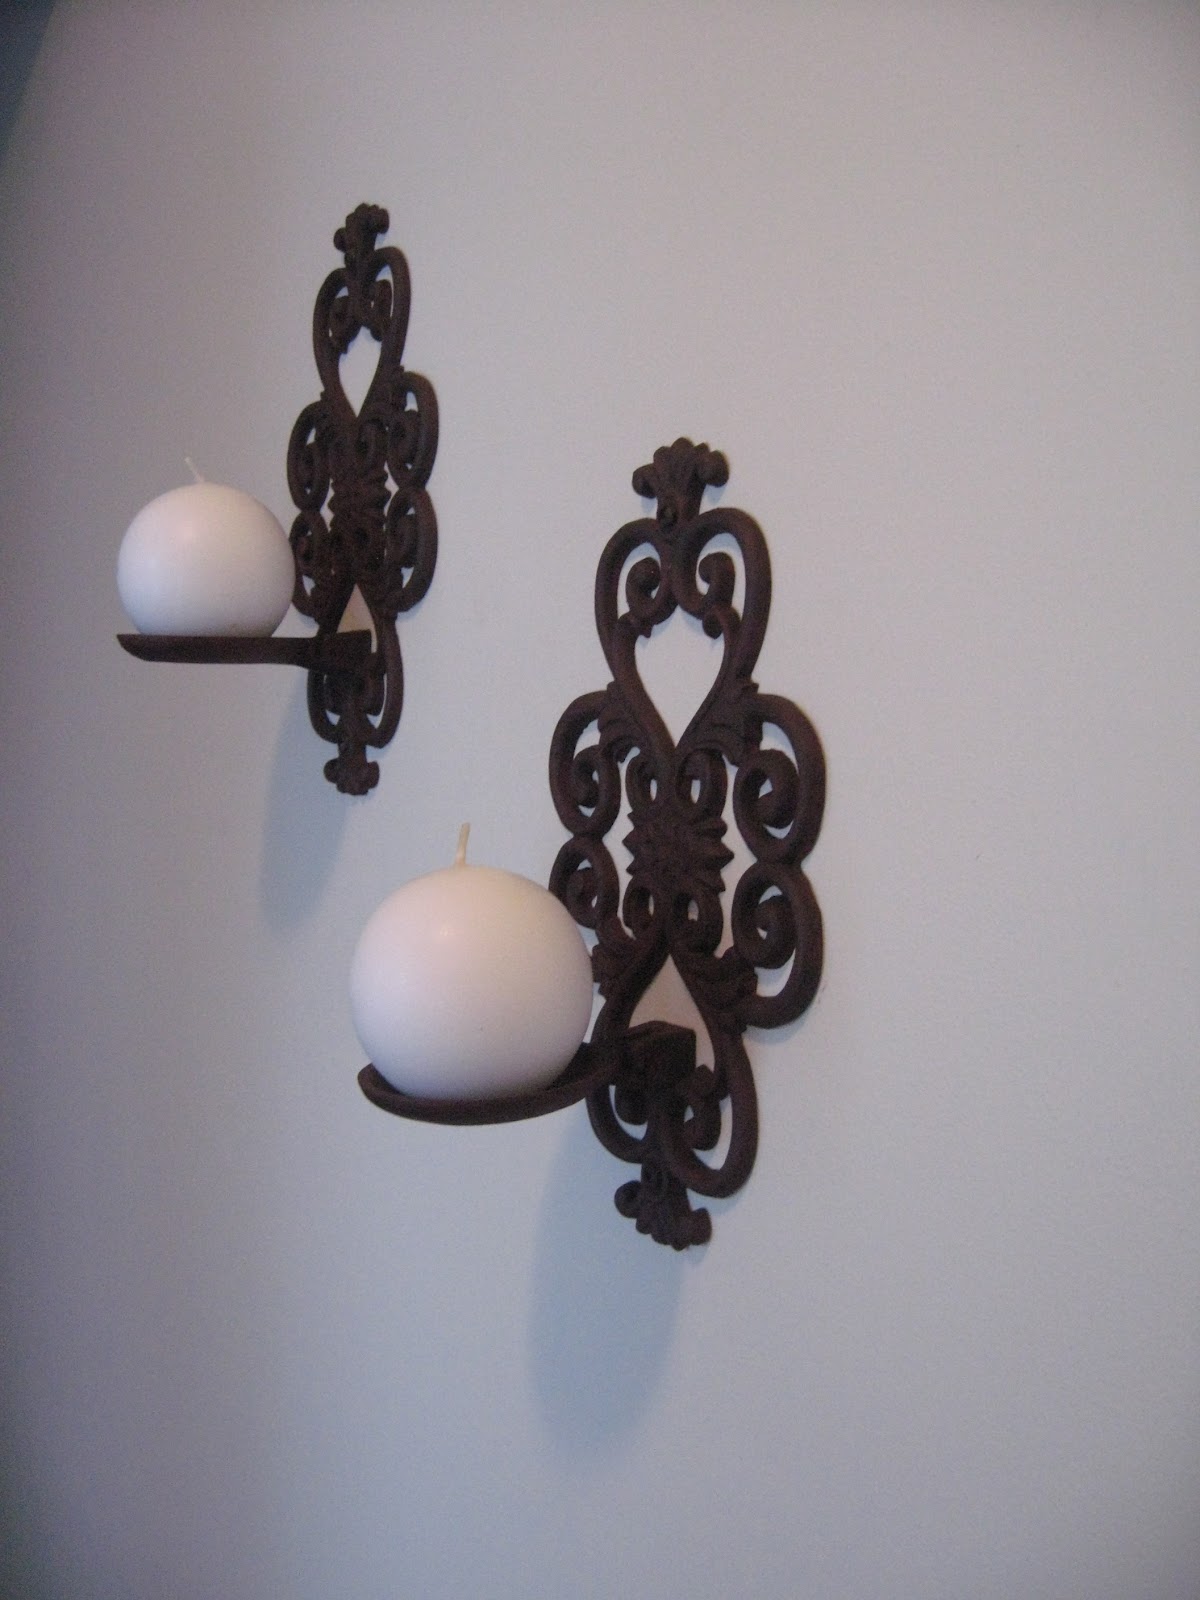
They are wrought iron wall sconce candle holders.  They were sold separately at $2.99 each. When I bought them they were a strange toffee colour. I painted them  a deep red, and then dry brushed a dark brown paint on top to give them an 'antiqued' look. I bought the round candles at Walmart. They came in a pack of two for $2.50.


They're currently hanging in our front entrance. 

I can't wait to get started on these. Pictures to follow! Stay tuned!

Sunday, 29 January 2012

Before and After - Dining Room

The dining room was pretty much a blank canvas when we moved into the house. The walls were the colour of a paper bag (much darker than the pictures show, and there wasn't even a chandelier hanging.

Here are some of the before and after pictures:

 Dining room before

Dining room before

 Dining room after. 
I think I posted this picture in a previous post, but it shows the whole dining room well. The table and chairs were given to us by my Aunt.

 View from the other side showing my frame and mirror collage.

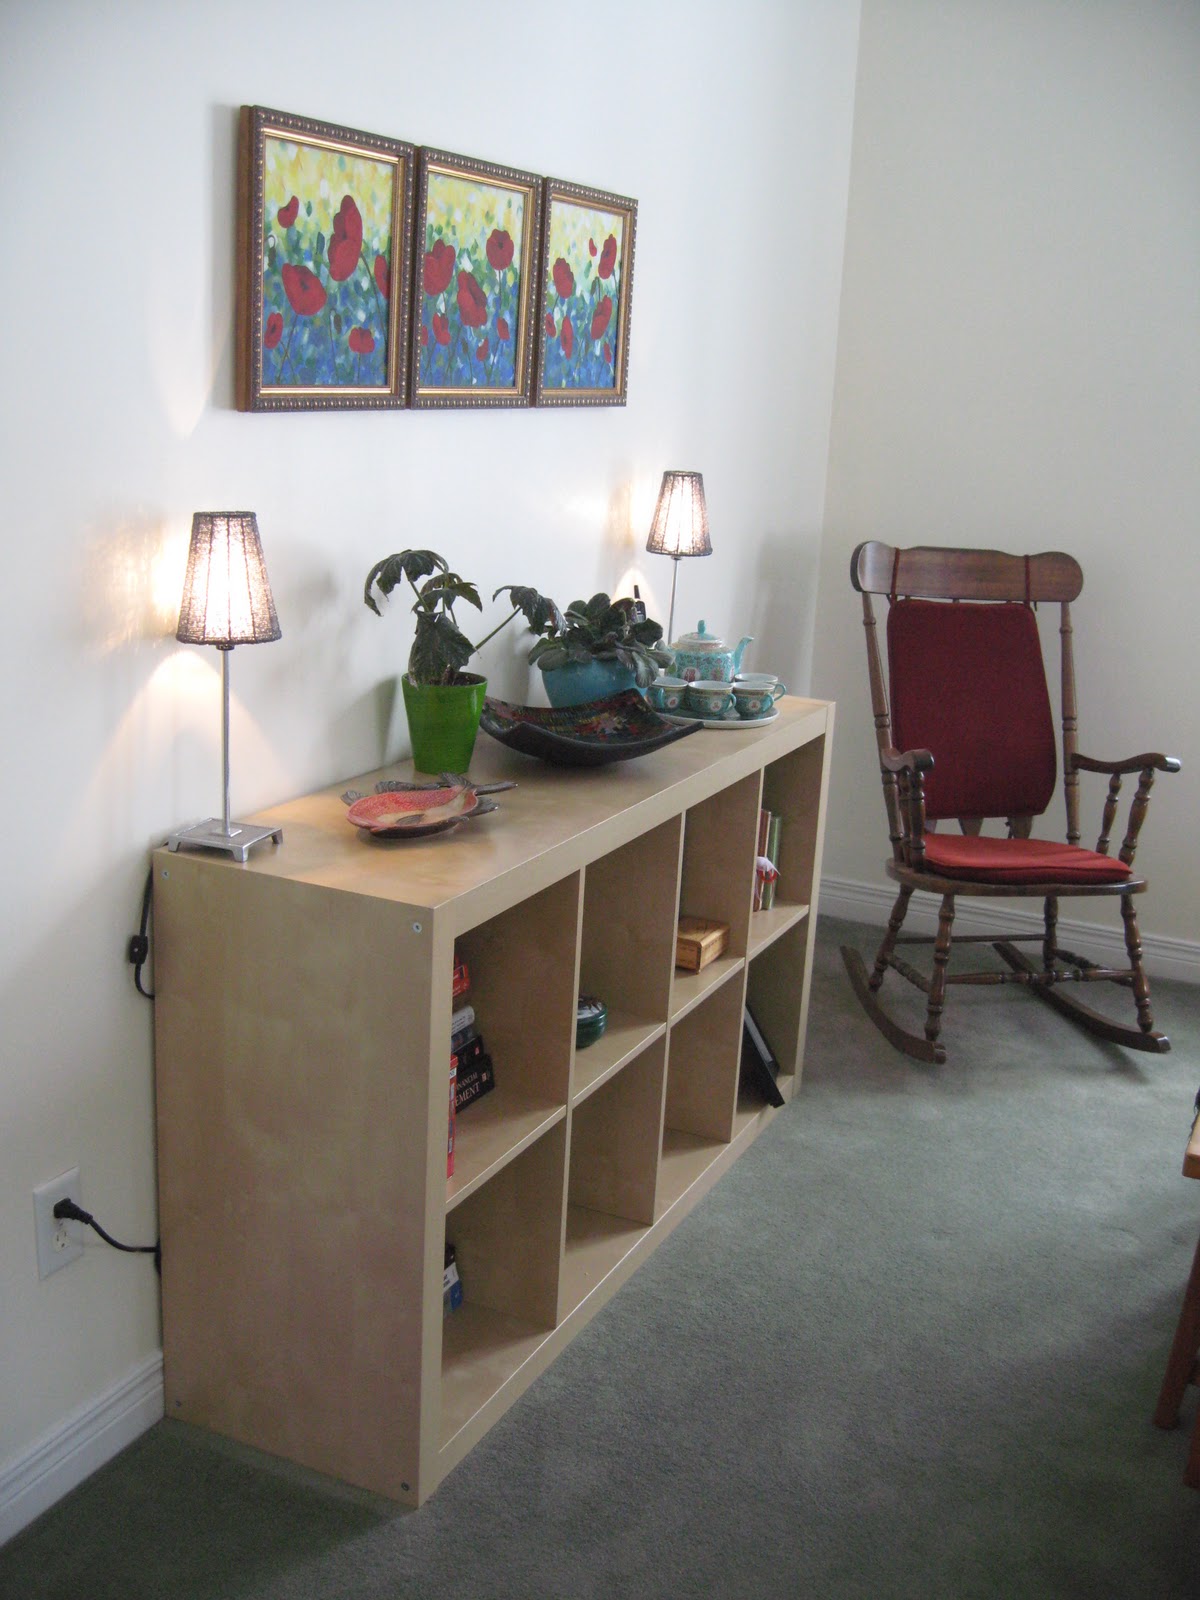
 Sideboard (bookshelf) from Ikea and rocking chair passed down from my Mom and Dad.

This one shows our new chandelier well.

Eventually, we might get a different table and chair set that seats more people, but this one works well for us at the moment. It's from Ikea many years ago and is actually 100% solid wood. That's very rare for Ikea now!

Lola

We've been having a really lazy Sunday Afternoon here. Lola has been all for it and has enjoyed lying in the sunshine.


Before and After - Main Bathroom

I've been busy doing little projects around the house to put the finishing touches on some of the rooms. I finally got around to finishing up the bathroom.

Here are some before and after pictures:

Main Bath Before (showing mirror damage near the tap)

 If I was in charge of naming this colour for the paint company, I would have probably called it 'salmon rose'. Not really my cup of tea.

Main Bath before. 

 Main Bath After - Framed mirror, fresh paint, new chrome toilet paper holder and coordinating soap pump.

 Main Bath After - New bathmat and waterproof fabric shower curtain.

 Main Bath After

Main Bath After - Poppy paintings that we previously had up in our old living room, new chrome towel rack and coordinating towels.

The final thing to do in there was to frame the bathroom mirror. It's not very visible in the before pictures, but there was some damage at the bottom of the mirror. It ran about 12 inches  either side of the tap and went up about 2 inches. I think it was just water damage, but I really didn't like it. I though about replacing the whole mirror, but when I started looking at mirrors that were big enough, I realized that they were way too expensive (around $200+)

I went to Rona (DIY store) and picked up two 8 foot pieces of MDF moulding. They have a cutting area there, so I brought the measurements of my mirror to them and got the guys in the store to cut the pieces to the right length at 45 degree angles to make the frame. It was so much easier than trying to cut them myself and making a mess (and possibly a mistake).

The moulding came primed, so I just painted it with some soft gold acrylic paint before I put it up.

Once the paint was dry, I applied LePage 'No More Nails' to the back of the pieces and put them up one by one.

This project was super easy, and I think it makes a big difference. The total cost for this project was under $15. Much better than buying a whole new mirror!

Monday, 23 January 2012

Memories of the UK Part 2

 Quayside. Gateshead looking over onto Newcastle, England.

Holyrood Abbey Ruins, Edinburgh, Scotland

Hamilton obelisk and the Governor's house, Calton Hill, Edinburgh, Scotland